1. Open TSR Workshop, select Create New Project then Builditem and click on Next.
2. Click on Fence and select the model you want to clone. There’s a lot of choice, but if you don’t make any specific fence that needs more than one cut/shader, use the Ladder-Style Horizontal Fencing as it only have one mesh cut and no medium LOD. That will ease the process A LOT. So whatever height or shape you want your fence, always use that one.

3. Name your project and click Ok.
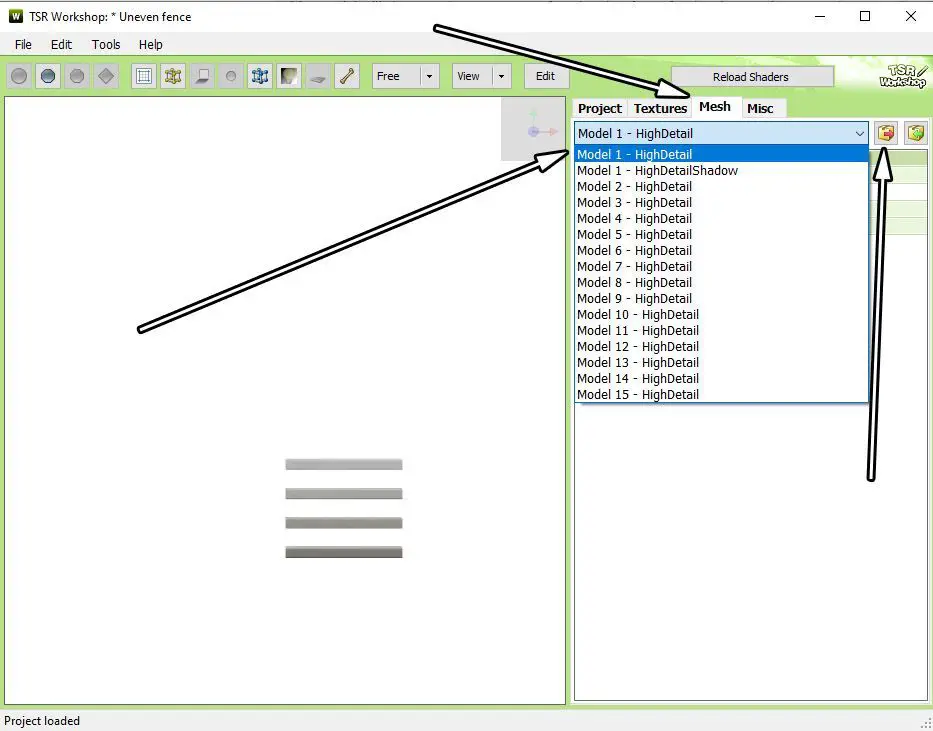
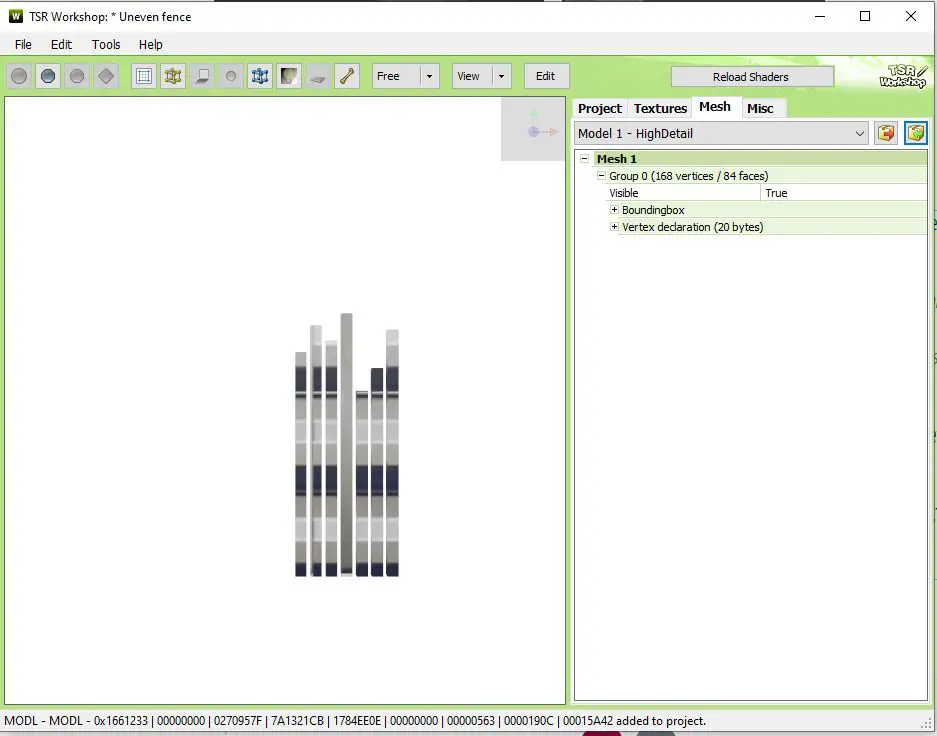
4. Go on the Mesh tab, and click on model 1. You’ll see that there are a LOT of meshes, but do not worry, because a lot of them repeat. There’s actually 6 different meshes:
- Model 1: The one tile fence
- Model 2: The diagonal fence
- Model3: The post
- Model 4 (and 7,12,13) : 6×6 curve fence
- Model 5 (and 8,11,15): 4×4 curve fence
- Model 6 (and 9,10,14): 2×2 curve fence.
Select each 6 models and export in .wso. Do not worry about the shadow LOD.
5. Open Blender and import all the .wso models
NOTE: You’ll need to install the TSRW plugin to import .wso files into Blender. Go into the installation file of TSRW (C:\Program Files (x86)\The Sims Resource\TSR Workshop\Extras\Blender 2.74) copy the blender plugin (io_wso_import.py – the export doesn’t work), then paste into blender plugin file (C:\Program Files\Blender Foundation\Blender\2.76\scripts\addons)
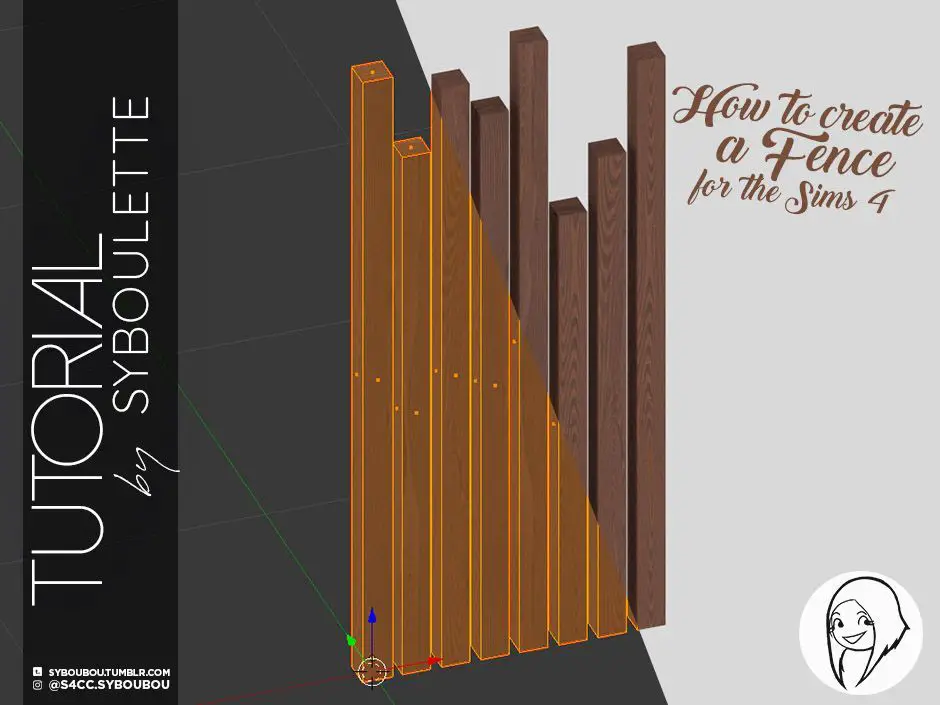
6. Unlike the stairs, fences are easy to make because they don’t need any vertex paint. They will simply repeat over tiles with a post (or not) between each tile, then use the model 2 for diagonals and the model 4,5 and 6 for curved rooms.
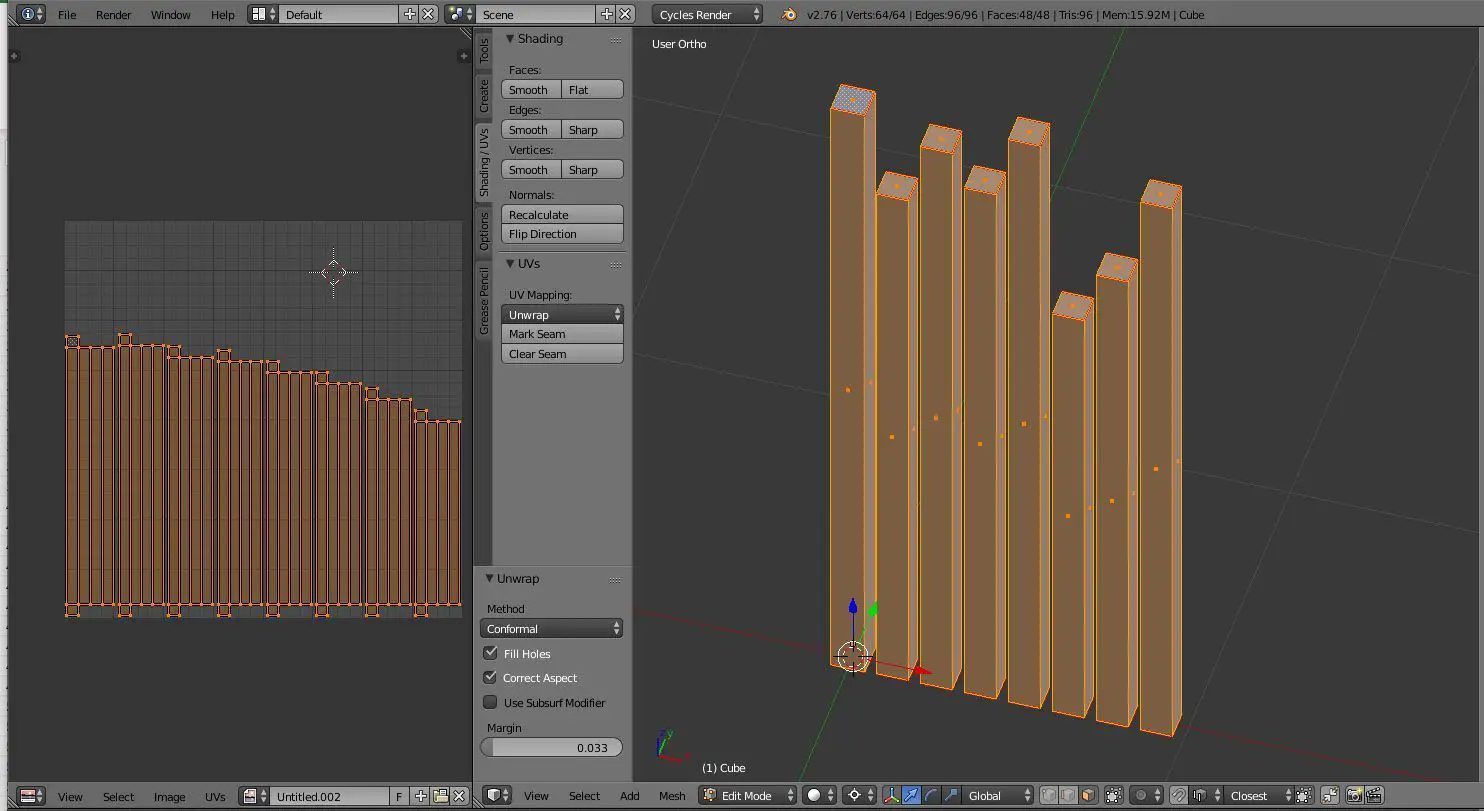
Use the imported meshes as template and mesh the model 1 and 2 (the tile and the post). When you are done, merge the 2 to unwrap the UVMAP and bake your textures.
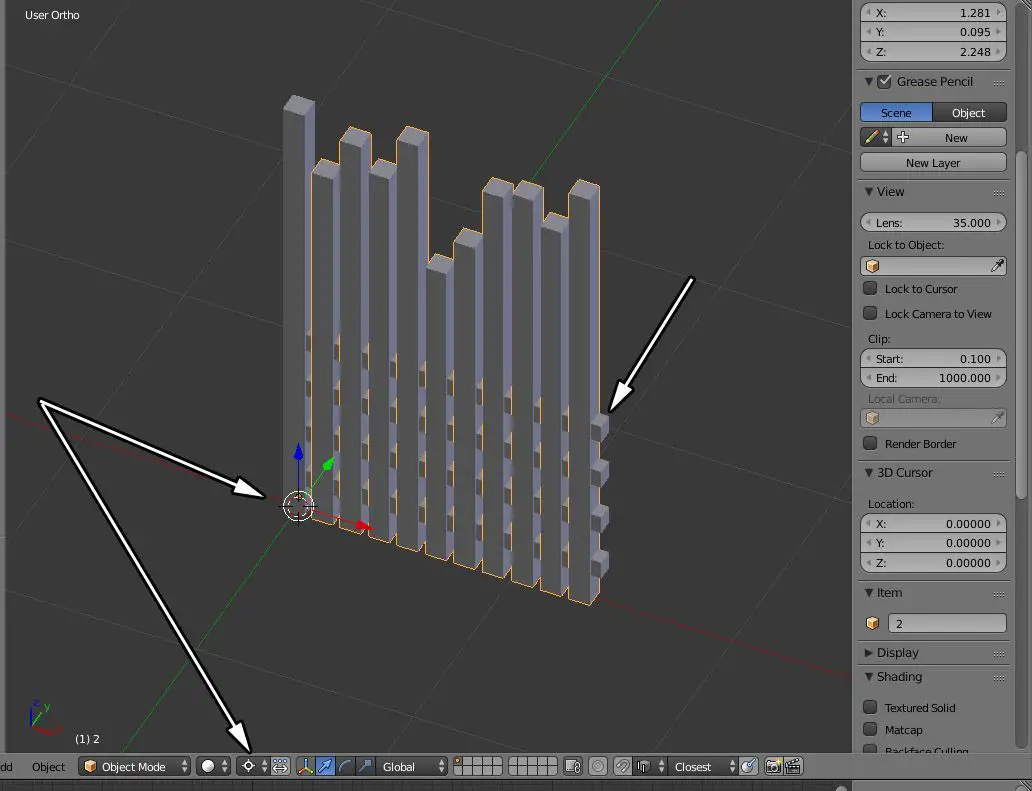
7. Separate the post from the group mesh (in edit mode, hit L to select the mesh, then P> separate selection), then duplicate (shift + D) the one tile mesh to create the diagonal. Hitting shift+C will reset the 3D cursor to the center: select the the 3D cursor to be the pivot point, then size the fence on x (hit s then x) to stretch it to fit the diagonal width. In the case of the model i’m creating, I can also duplicate three beams to fit the width.
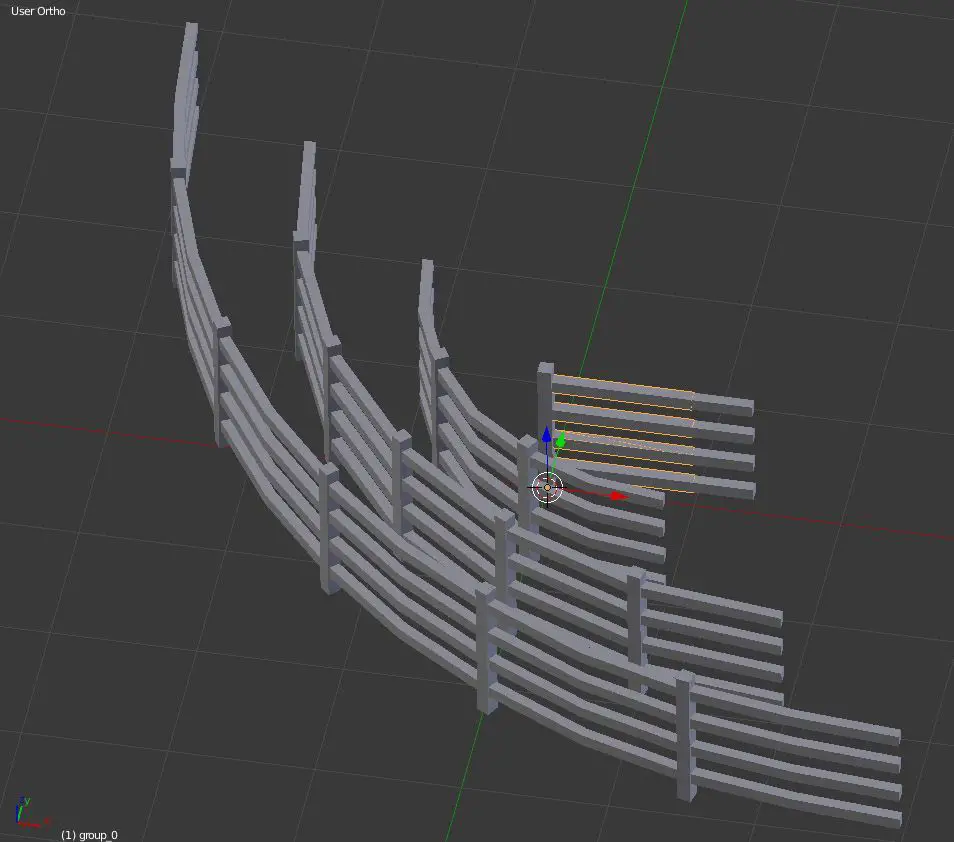
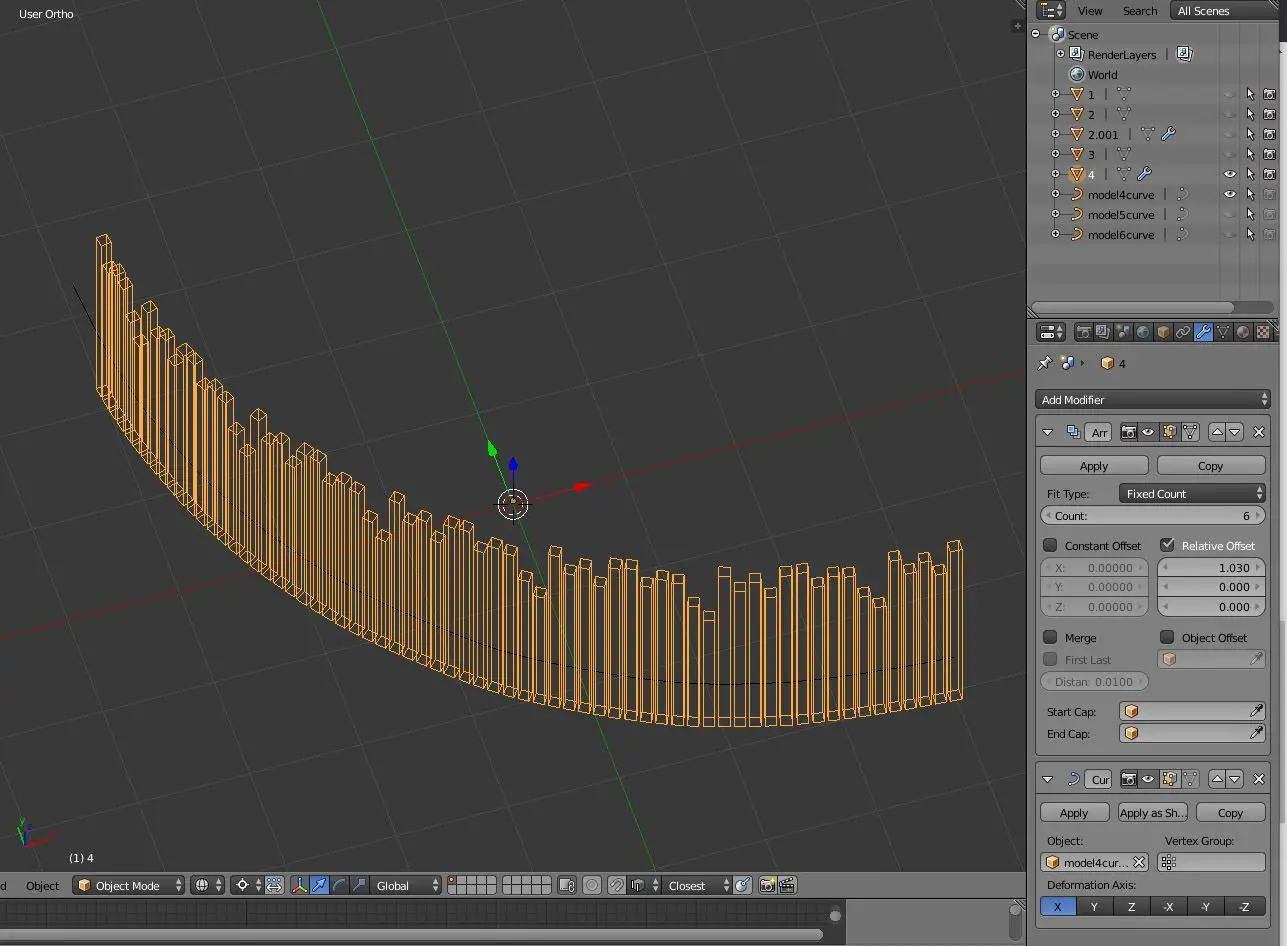
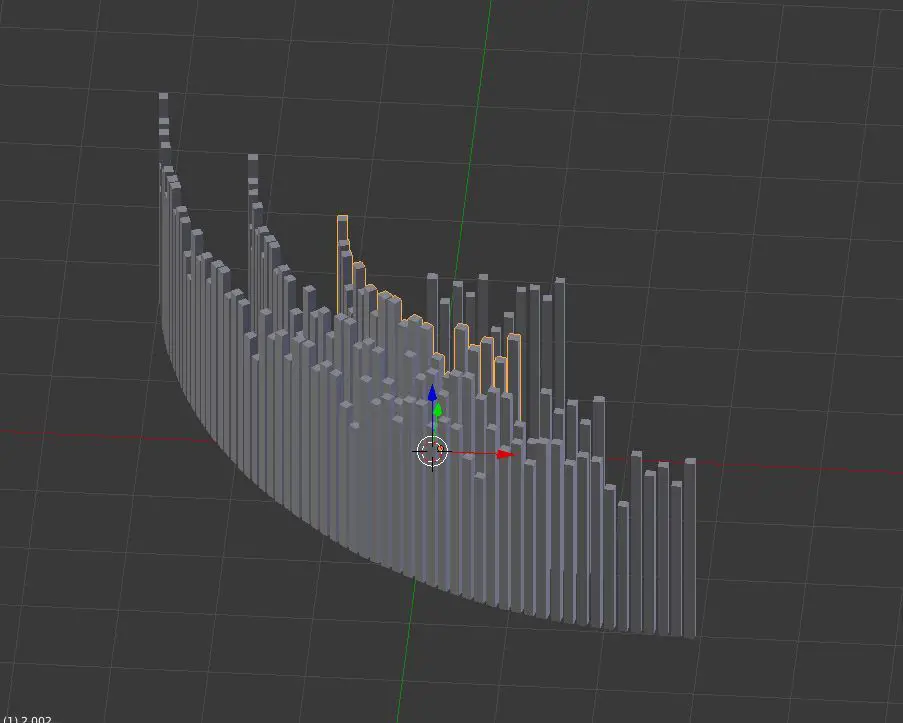
8. Now we’ll need to create the curved sections. There a many different ways to do this: you can give the shape you want, as long as the beginning and the end of this mesh match perfectly with your template so that your fence in game will join both ends. You can edit it manually, or you can use blenders modifiers like array and curve to follow a path that you would have previously drawn following a bezier curve.
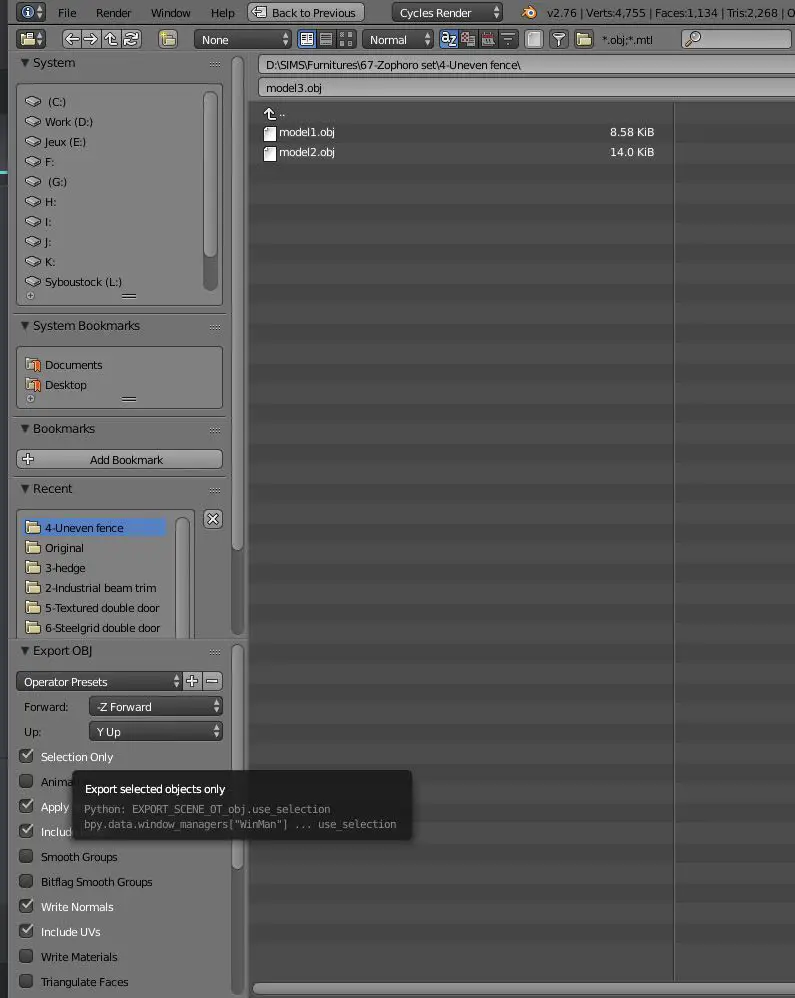
9. Once you have all your 6 meshes edited, we’ll need to export them in individual .obj files. For that, click on one mesh group, go to File > Export > .obj and make sure you toggle the option on the bottom left “Selection only”.
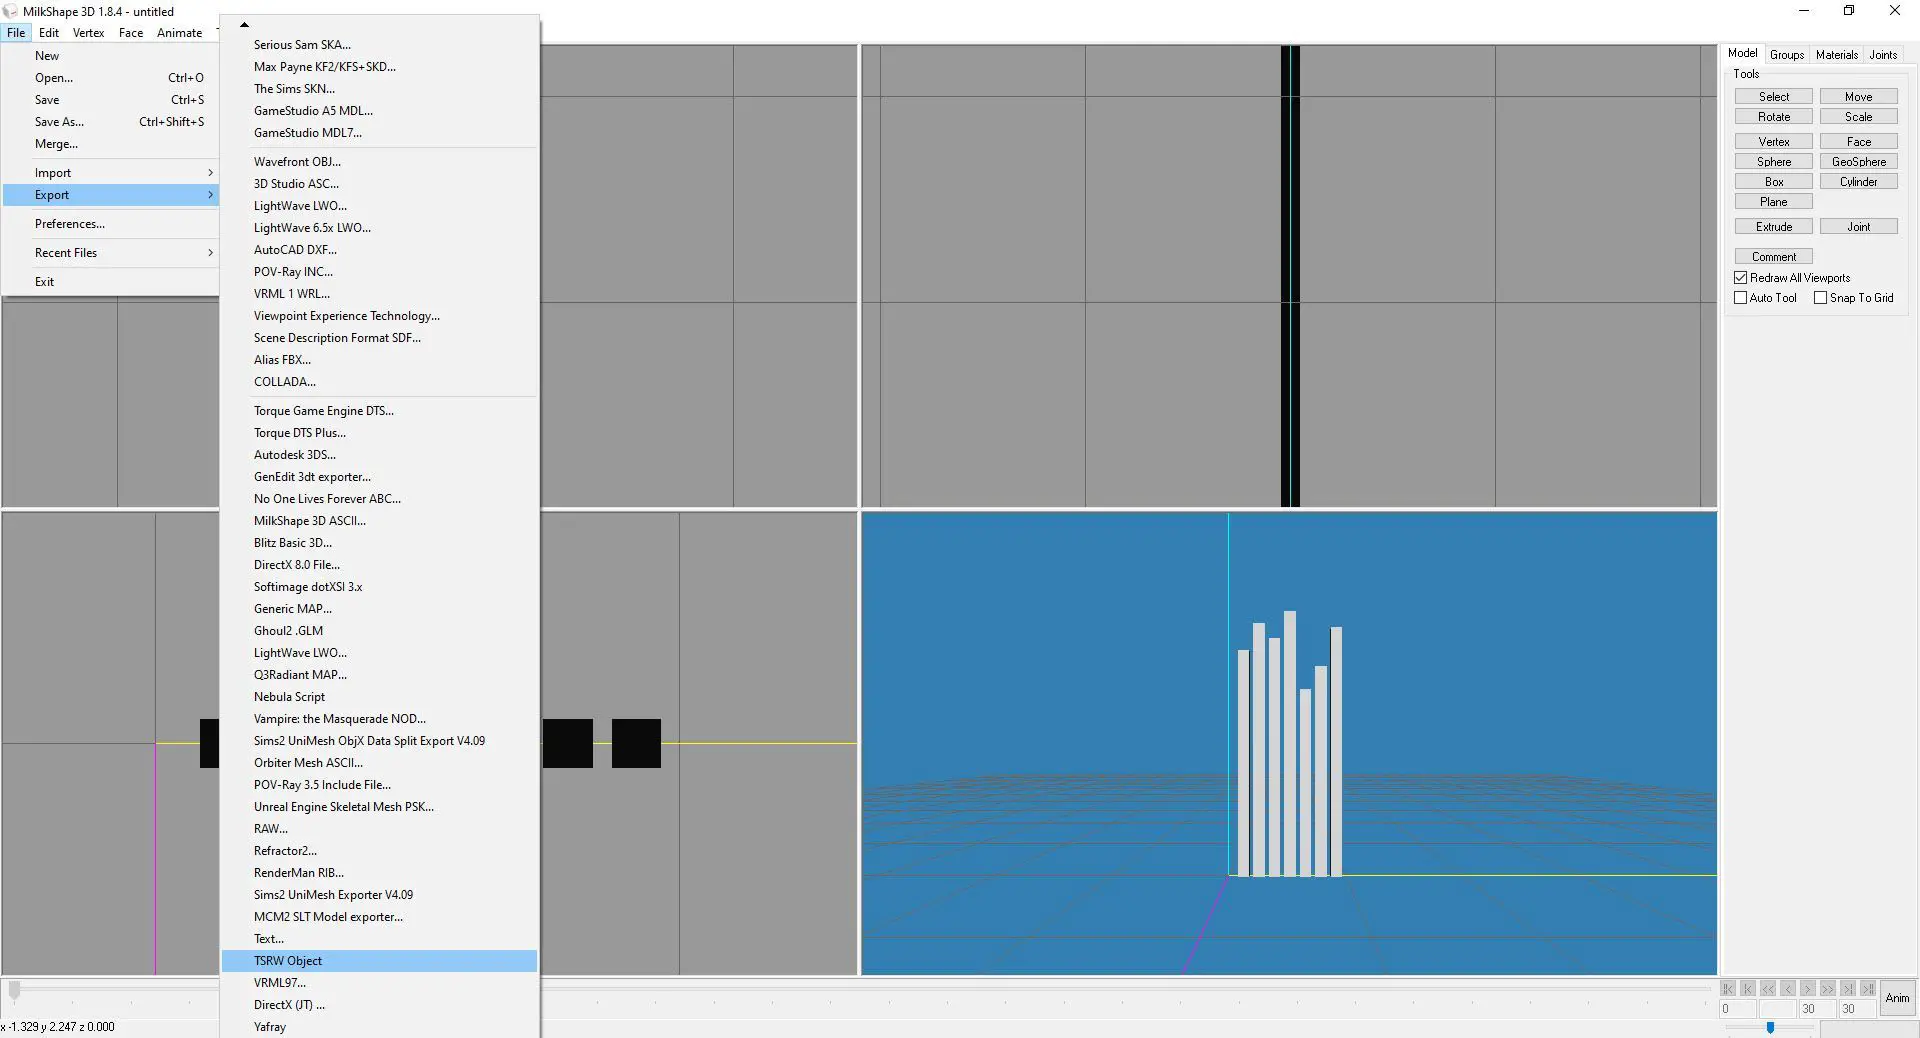
10. This is where we’ll need to use Milkshape 3D: because TSRW can’t import either blender or .obj file and because the TSWR plugin to export blender fils into .wso doesn’t work, we’ll need to use this crappy software as a bridge.
NOTE: You’ll need to install the TSRW plugin for Milkshape to be able to export in .wso. Go into the installation folder of TSRW(C:\Program Files (x86)\The Sims Resource\TSR Workshop\Extras\Milkshape Plugins) and copy the plugins (msTSRWorkshopExport.dll and msTSRWorkshopImport.dll), then paste into the milkshape repertory ( C:\Program Files (x86)\MilkShape 3D 1.8.4)
NOTE: Since october 2022, Sims4Studio is compatible with Blender 3, plugins are now working as they should, so no need to use milkshape anymore !
Import one after after another each obj. model then export in .wso (TSRW Object in the list). Don’t forget to hit New between each models or the software will stack up models.
11. Now back into TSRW, we’ll need to import each modified models. Remember that Model 4 goes aswell for models 7,12 and 13, Model 5 goes for models 8,11, and 5 and Model 6 goes for models 9,10 and 14. Again, do not worry about shadow LOD.
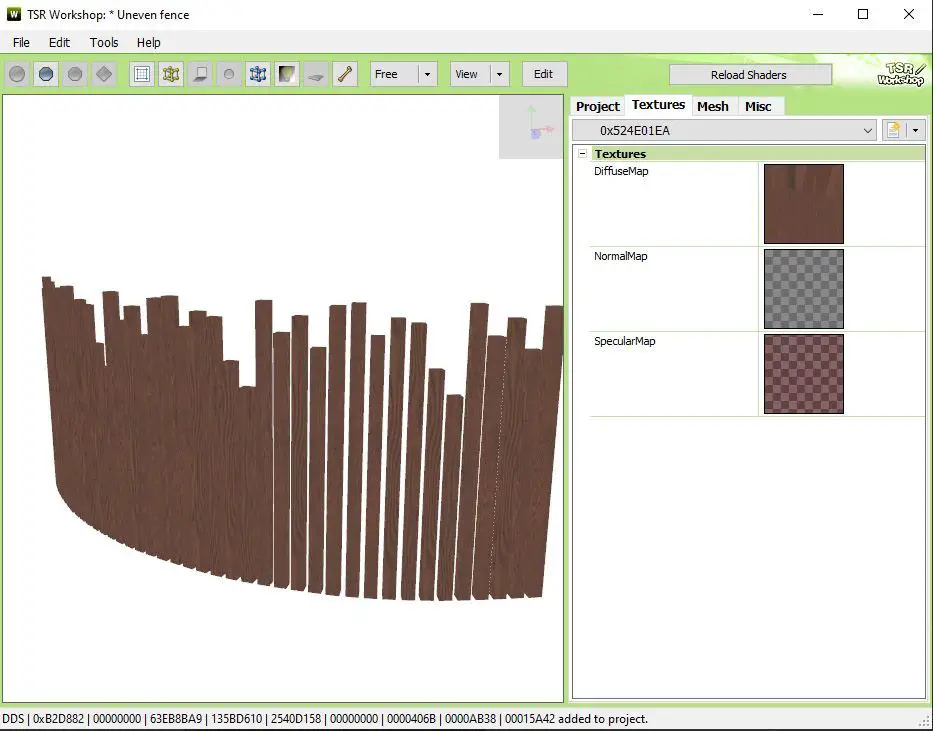
12. Once all models have been replaced, we can now import all the textures into TSRW. Select the Textures tab then click on the scroll menu: select the first instance number.
13. You can start by replacing the specular and normal map. Click on SpecMap then click on Edit.
14. A window will open: click on Import then select your specmap texture. Click on Done and it will ask you if you want to apply the Specmap for all LOD: select yes. Do the same with the normal map.
15. Now click on the Diffusemap and then Edit. Click on Import and select your diffuse texture: it will shows in a new window, don’t toggle anything and click on Continue. The texture will appear in the window (it might take a little time if your texture is 1k or more). Click on Done: it will ask you if you want to update the Diffuse map for all LOD: select Yes.
Note: You might notice that TSWR does not automatically update the texture on the main viewport like S4S does. For that, you’ll need to click on the scroll menu, select the first instance number again and it will reload the texture.
16. Sometimes, it doesn’t save the first texture on the first try. To be sure and to not restart again, Save your file (ctrl + S), close (ctrl +W) and reopen (it should be in the Recent projects list). If your texture shows, then you may continue, if not, restart from 13.
17. Now that we have our first texture, you may want to edit the color swatch. Click on the Project tab and look at the colorswatch menu: you can add or remove color swatch with right click and choose from custom/web or system predefined colors. If you want the color wheel, click on the arrow next to Color, click on custom tab then right click on one of the blank square at the bottom.
18. Now click on the little page on the right corner to create a new swatch. If you click on the scroll menu, you’ll see it has duplicated the ressource (both ressources if you’re using a walled staircase)
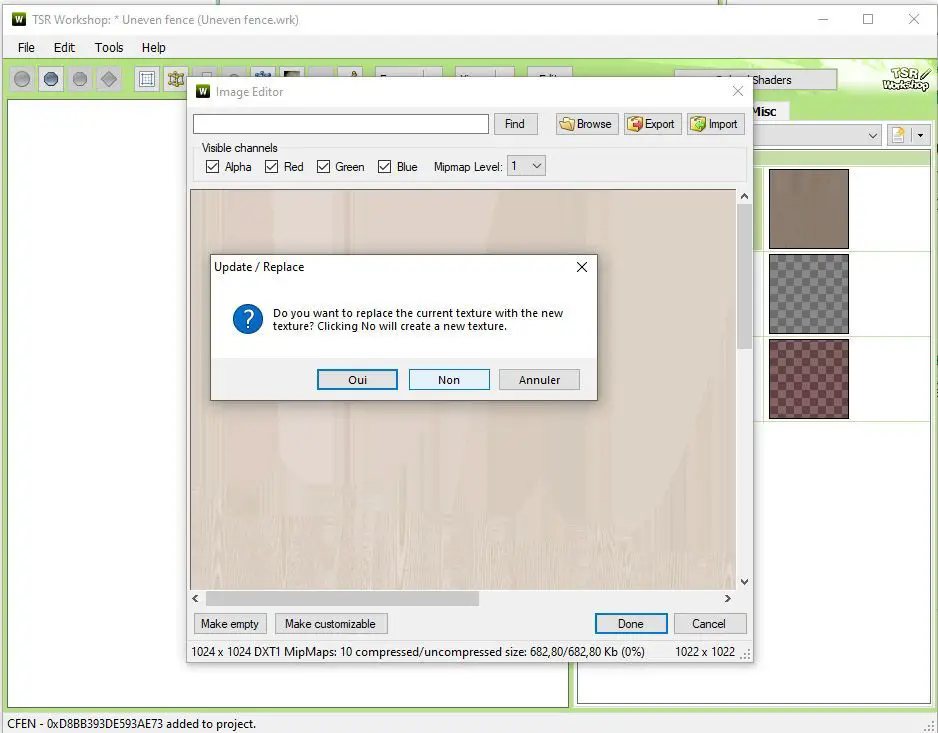
19. Go in the Textures Tab then click on the Scroll menu and select the first instance number. We will not have to replace all SpecMap as this has been done automatically. Instead, click on DiffuseMap and Edit. Click on Import, select your second texture, click continue and then Done. It will now ask you if you want to replace the current texture with the new texture: select NO (this might be confusing at first). It will then ask if you want to replace each LOD, click YES. (Don’t go too fast on those windows…).
20. Same as before, you’ll need to click on the scroll menu>first instance number if you want to refresh the viewport. This is not necessary, this is only if you want to see the texture.
Click on Project tab, then edit your colorswatch.
21. Repeat the operation from 31 to 34 for each new color swatch you need to add.
22. When you’re done editing you swatches, save then click on File > Export > to .package
22. Open Sims 4 studio and open your fence package. As you’ll notice, the file is not completely recognized by the sofware and you won’t have the studio tab. The package already works if you load it into your game, but there a few things we can change to make it perfect.
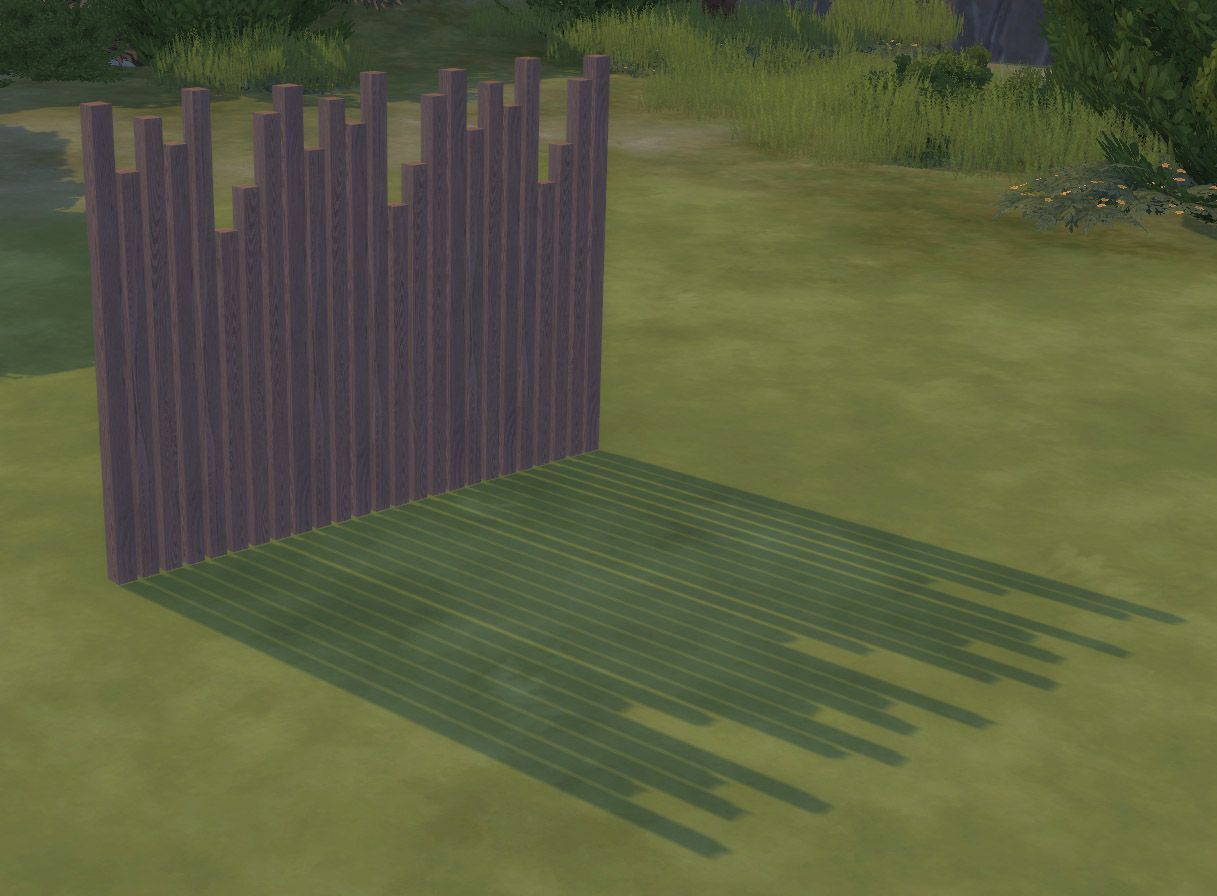
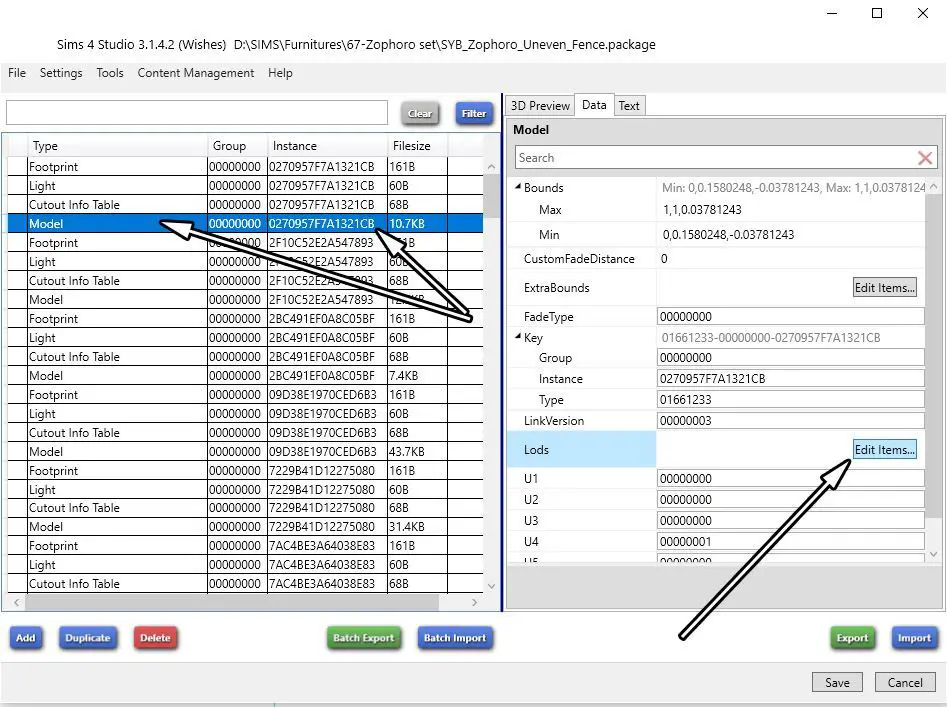
23. Remove the shadow LOD. In order for the shadows to cast properly and to avoid “see through” graphic issues, remove the shadow LOD from the package. You cannot miss it, it’s the only Model LOD ressource. Just hit delete.
Now find the Model that corresponds to the model 1 (it has the same instance number than the model LOD we just deleted). Click on data tab, then Lods > Edit items. Select the ShadowHigh details line, and remove it.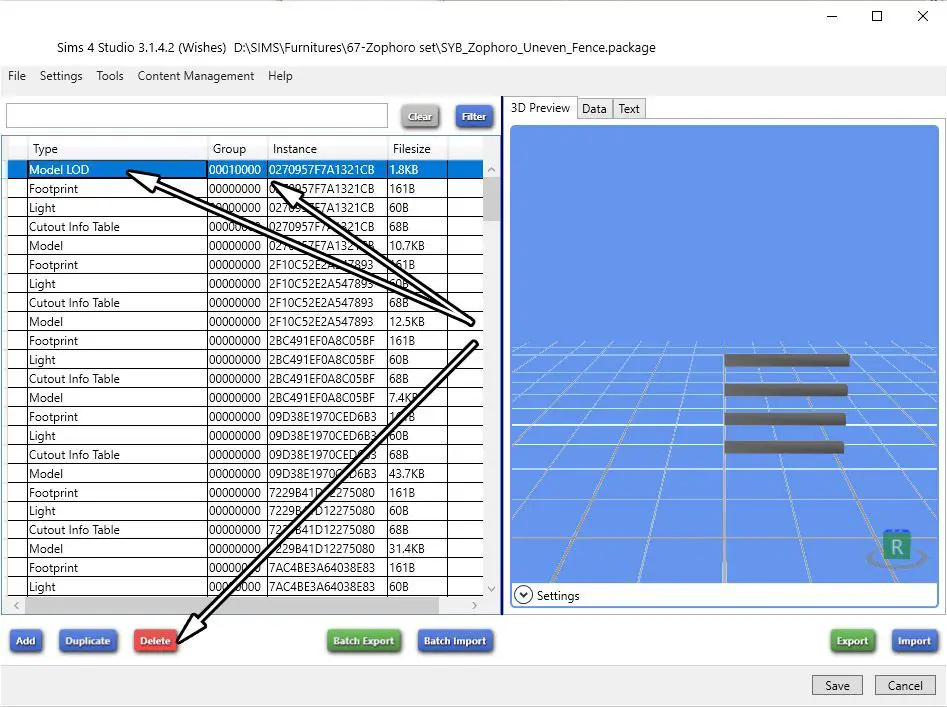
24. Generate thumbnails. For the game to generate properly the thumbnails, delete all Buy Build Thumbnail ressources, then edit the Group number of each Fence ressource from 80000000 to 00000000.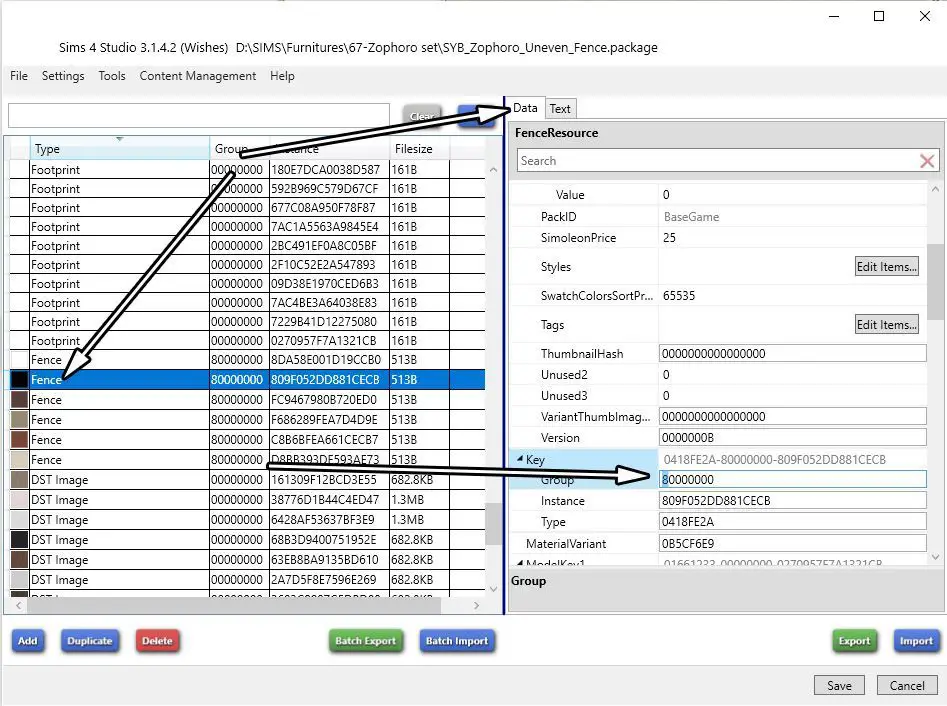

25. Reordering color swatches. If you want to keep a certain order in your color swatches, you can edit the SortField in the Fence ressource. Put 0 for the first swatches, 1 for the second, 2 for the third, etc.
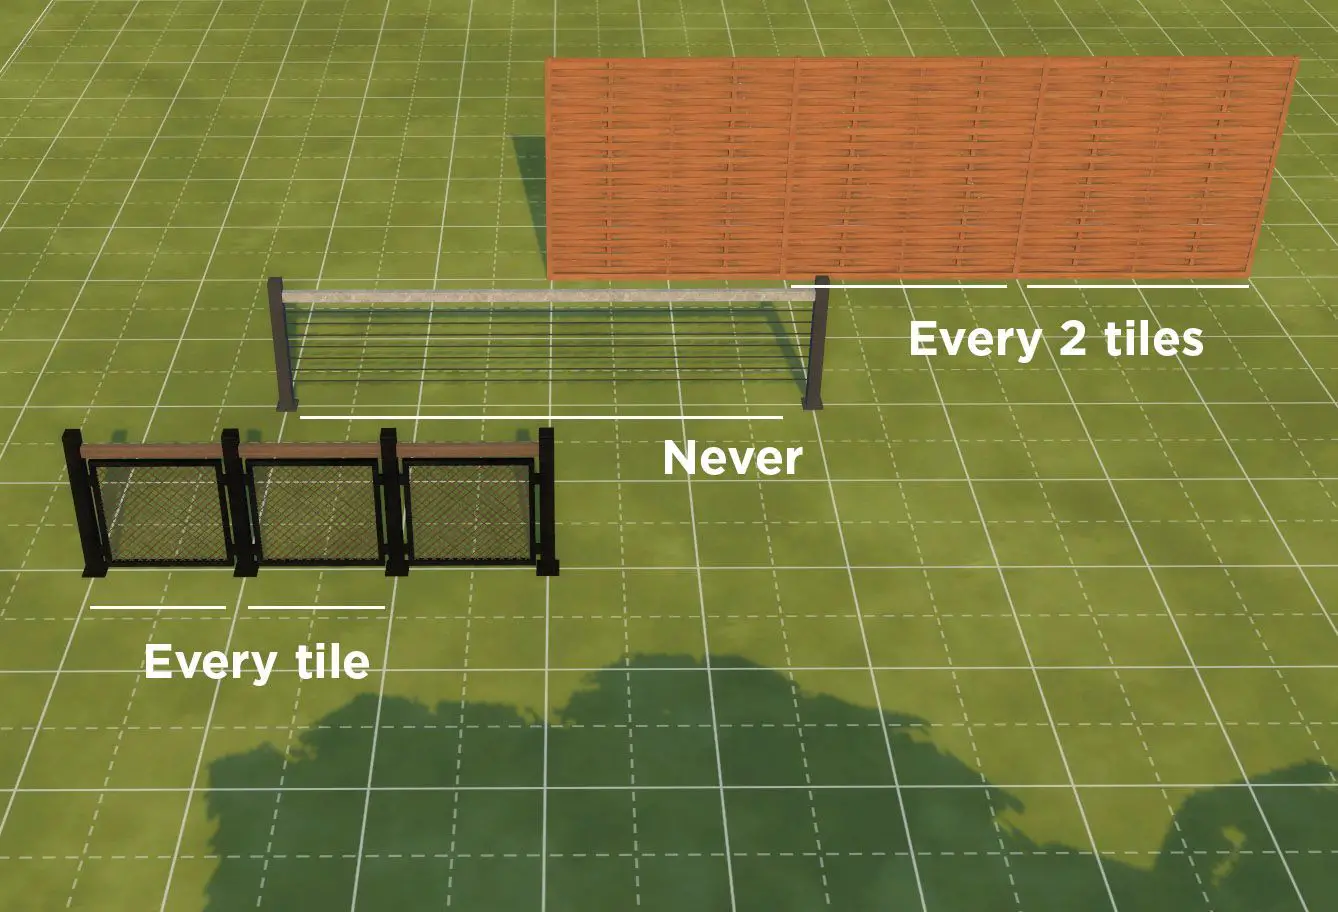
26. Edit post repetition. Depending on the design of your fence, you might want to choose where does hte post will repeat. In the Fence ressource, you’ll have U1 and U2: the number here corresponds to where the post will repeat: put 0 for the post to never repeat, 1 for every one tile, 2 for every two tiles, etc. Change the valuefor each Fence ressource.

27. Save and try your fence in game 🙂