You can skip this part if you already installed S4S.
1. Go to the Sims 4 studio website to download the last version of the software.
2. Choose Wishes version for Windows or Candy Apple for Mac
3. Scroll until you see a big red Download and click on installer.

4. Extract .zip if necessary or click on .exe
Note: If you have an antivirus protection, you might get a message error telling you it’s not secure. If you downloaded from the original website, it’s completely safe ! So just allow it and continue.
1. Open Sims 4 Studio
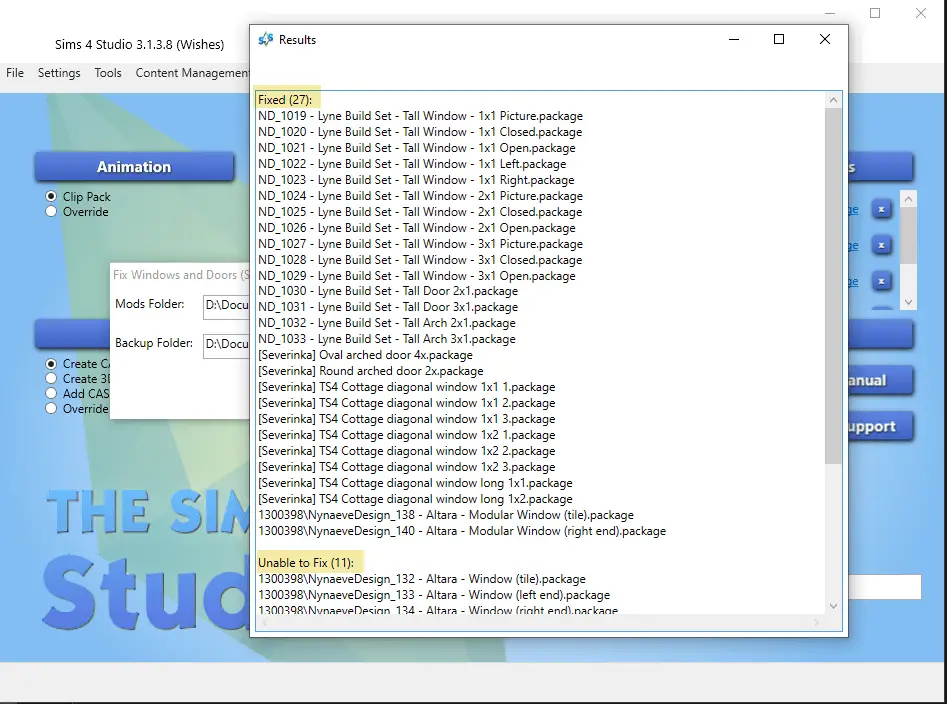
2. Go to Content Management > Batch fixes > Objects > Fix Windows and Doors

3. Verify that the path to your mods folder is right then click on Run
Note: This action might take a while, let the software do his magic !
4. And that’s it !! You’ll see the report and how many items had been fixed. Some of mine didn’t work, but the vast majority did.
Thanks SO MUCH to the amazing team of S4S for their work and dedication ❤️
For the batch fix to work, the .package need to be from “before”, meaning it needs to miss the new “model cutout”. In that case, you’ll need to delete it for the software to generate a new one.
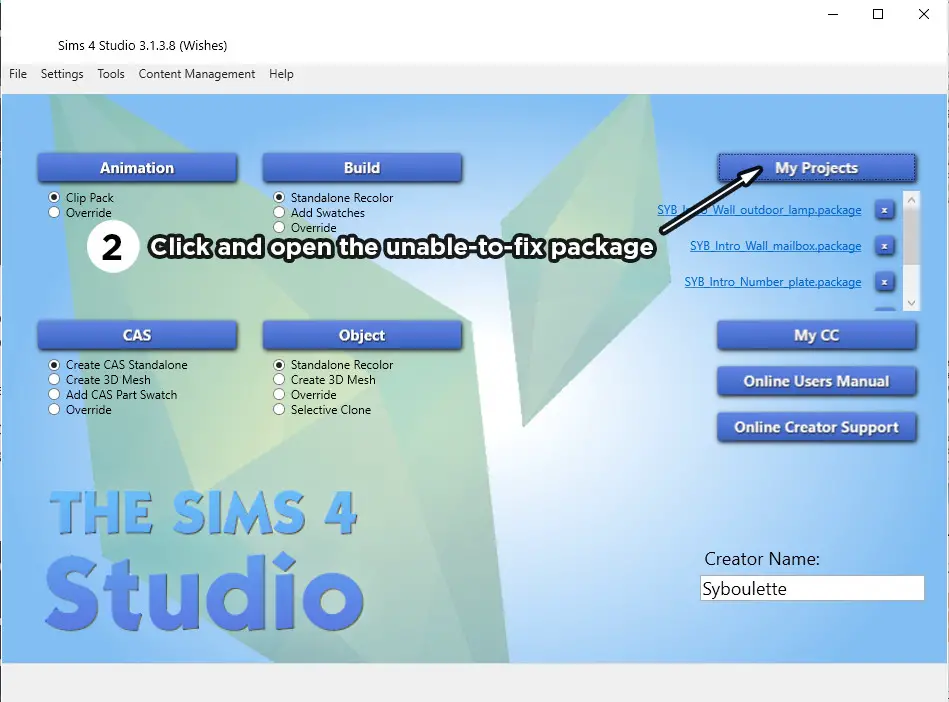
1. Open Sims 4 Studio
2. Click on My Projects and select the unable-to-fix package
3. Go to Warehouse tab and search for Model Cutout in the list
4. Select the ressource and click delete
5. Save
6. Rerun the batch fix
And fixed !